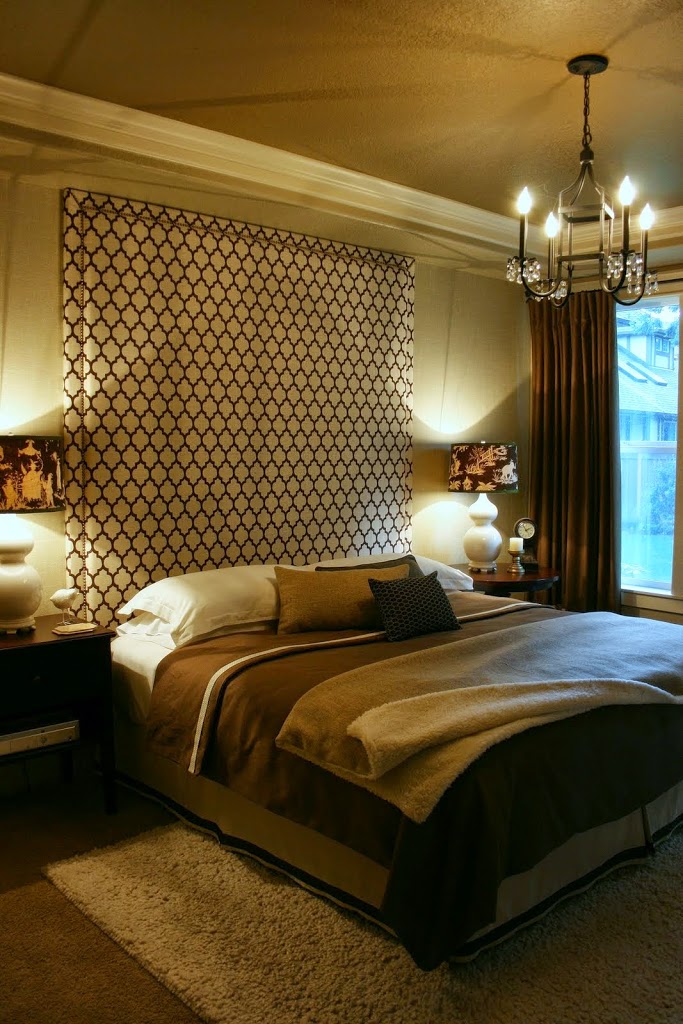
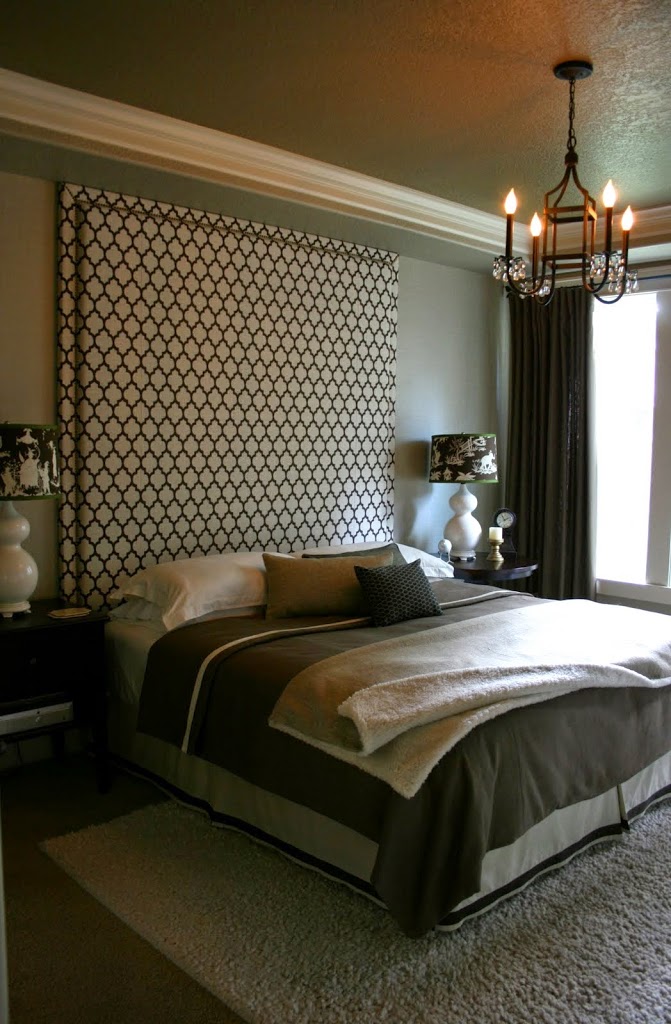
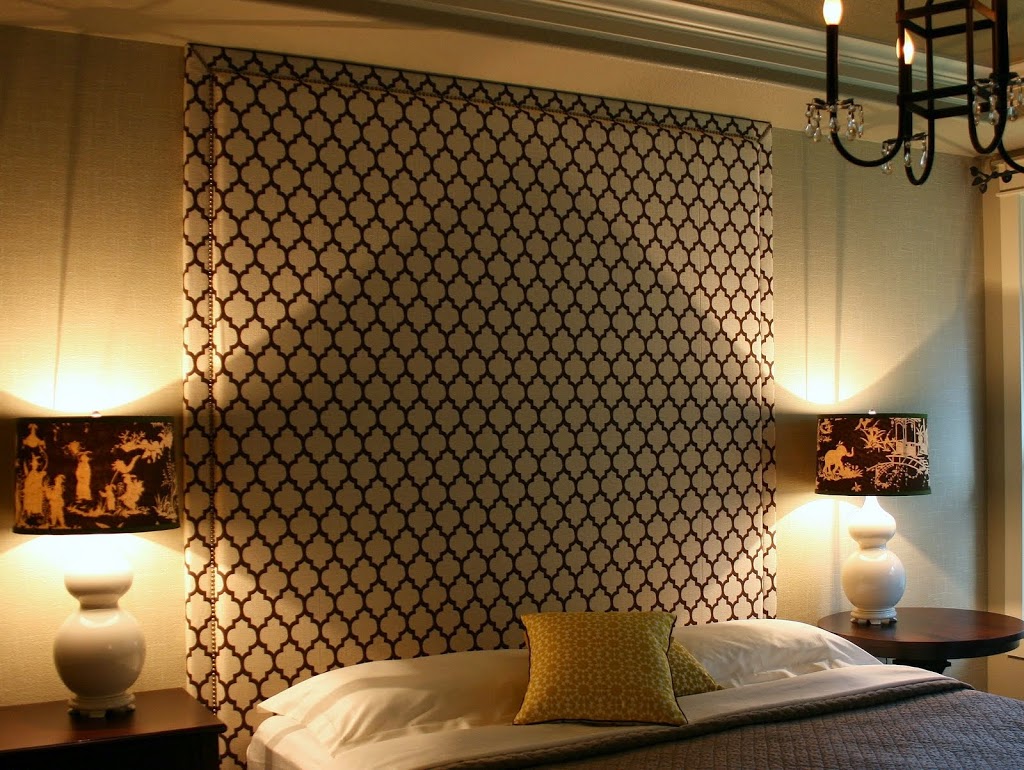
Incase you’ve been loving and ‘eyeing’ these fabric headboard beds in some of these Lagos showrooms like I’ve been doing for a while, but the price “no gree you” especially the ones with tufting, well let’s just say you are in luck.
The good news is that you can finally have your own fabric headboard bed! but you have to do some little work. The better news is that the process is very easy and all you need to do is a little cutting and a little joining here and there. The best news is that all the materials are available here in Nigeria (visit Tejuosho, Balogun market or other markets and look for the furniture section and basically ask around) and the most technical tool here is the drill. Oh, and I almost forgot, the “bestest” news, you can do it in the comfort of your home/bedroom, just get the plywood cut with your local carpenter and take it home. Please pardon my “bestest” english. Here’s a simple process from This old house that really breaks down the steps involved:
~ What you will need ~
1. 1/2 inch Ply wood cut to size-
Add a minimum of 3 inches to both side of the mattress for the width. and 24 inches above the mattress added to the height of the mattress from the floor to give the total height of the plywood.
2. 1 inch thick foam.
3. Batting or muslin cloth to hold the foam in place before attaching the fabric.
4. Fabric.
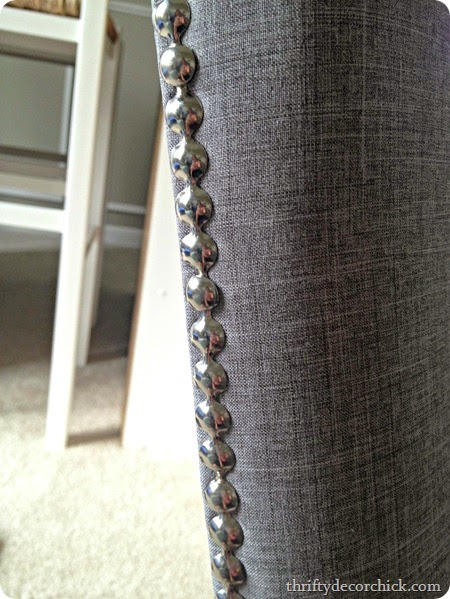
5. Nail head trim.
6. Spray Adhesive.
7. Tools – A cutting knife, staple gun, drill, bolts, rubber mallet, clamps hangers and studs. You can get these from a tool shop. Shoprite in lekki has staple guns.
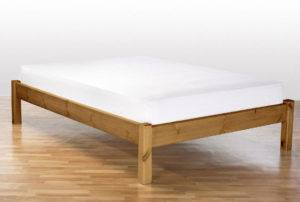
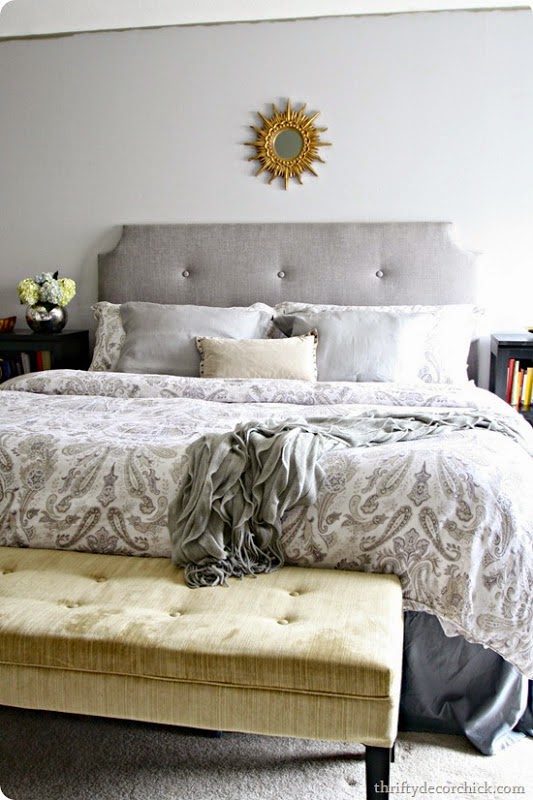
Please note that this can only be done with a bed that doesn’t have a headboard already. If its a new bed and you want to try this, have the bed done with only the frames. No headboard at all. It will look like this picture below. If its an old bed that you want to update, you can have the headboard removed then replace that section of the frame to look like what you have on the foot side of the bed.
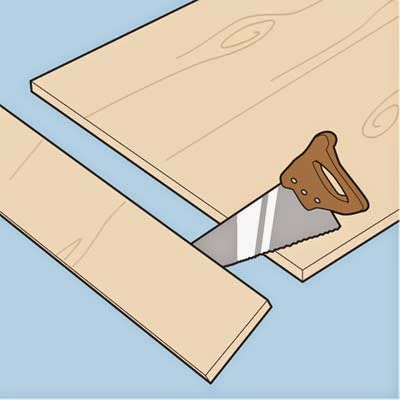
~ Step 1, Cut the plywod ~
Use the measurement you get to have the plywood cut to the size you calculatedand have it transported to were you will assemble everything (your home or workshop) or you can cut it yourself if you can operate a saw.
~ Step 2, Cut the foam ~
Have the foam laid on the floor, then place the plywood over it. Using a pencil or a pen, trace the outline of the plywood board on the foam. Remove the board from the foam, then cut it using the knife.
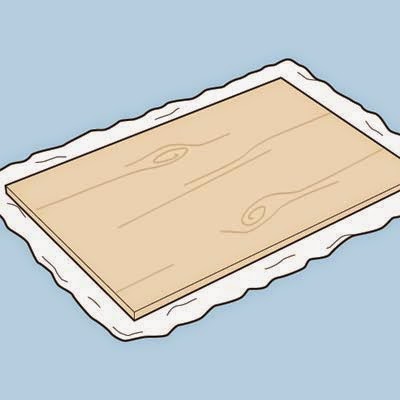
~ Step 3, Cut the Batting and the fabric ~
Lay the batting on the floor and place the board over it as in step 2. But insted, add a minimum of 3 inches on each side so you can have enough fabic to pull over the edge of the plywood. Use thesame process to cut the fabric too.
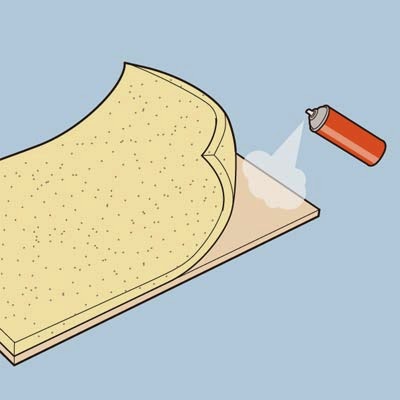
~ Step 4, Attaching the foam ~
Use the spray adhesive to glue the foam to the plywood. After application, leave it to dry.
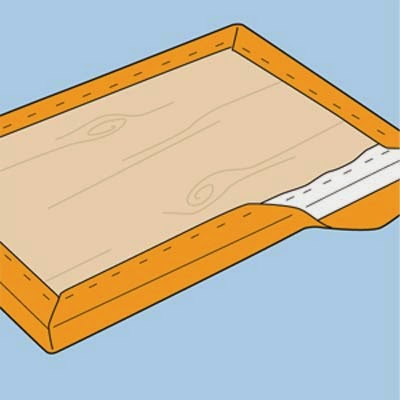
~ Step 5, Attaching the batting ~
Lay the batting on the floor again and have the plywood centered on it with the side with the foam. Pull the batting’s allowance over the plywood as firmly as possible, attaching it with a staple gun as you continue.
~ Step 6, Attaching the fabric ~
Make sure your fabric is clean with every wrinkle neatly ironed out. Center the fabric over the right side of the headboard with the right side of the fabric outside. Hold the fabric in place using clamps or sewing pins if needed, then place the headboard with the right side on the floor, remove any clamp or pin, then pull firmly over the board as you did with the batting. Fold the fabric at the edges neatly using the staple gun to hold the fabric in place as you pull on.
~ Step 7, Attaching the nail trims ~
With the right side up, that is, facing you, attach the nail trims to the headboard starting from the bottom of one side, progresing upwards. Run the nails in using a hammer.
~ Step 8, Finishing ~
Screw two hangers or as needed and use that to determine where the studs will be on the wall. For more flexibility, you can attach the headboard to the bedframe using bolts. Cut out a rectangular shape on the right side of the head board at the point where the board will be bolted to the frame . As shown below;
~ Variations of the the fabric headboard with specific tutorials ~
I think this DIY is an interesting one, as it offers you a lot of styles and versatility. You can use whatever fabric you choose, including ankara, a good quality leather or even a pre-woven material amongst other choices and you can customise your headboard like the stepped one and the one with curved cut out edges and tufting; its just about how ingenious you are and how you cut your plywood.
We hope you enjoy doing this project and please don’t forget to share with us your final results.
Also if you know of any specific place in Nigeria where one can get the materials and tools in our DIY posts, please leave a comment. Thanks.
Credits; This old house, House of Fifty, Thrift Decor Chick.